
Matcha Mochi
Matcha mochi, soft and chewy mochi with a tinge of matcha bitter and a creamy sweet bean centre. Simple homemade goodness and a lil’ delicious delight. Enjoy them freshly made 😊
Servings: 16 matcha mochis
Ingredients
Mochi dough
- 1 cup glutinous rice flour
- 1/4 cup caster sugar
- 2 1/2 tsp matcha powder
- 200 ml milk @room temperature
Filling
- Hokkaido mashed azuki bean paste (Check the link in the above blogpost)
Instructions
Mochi Dough
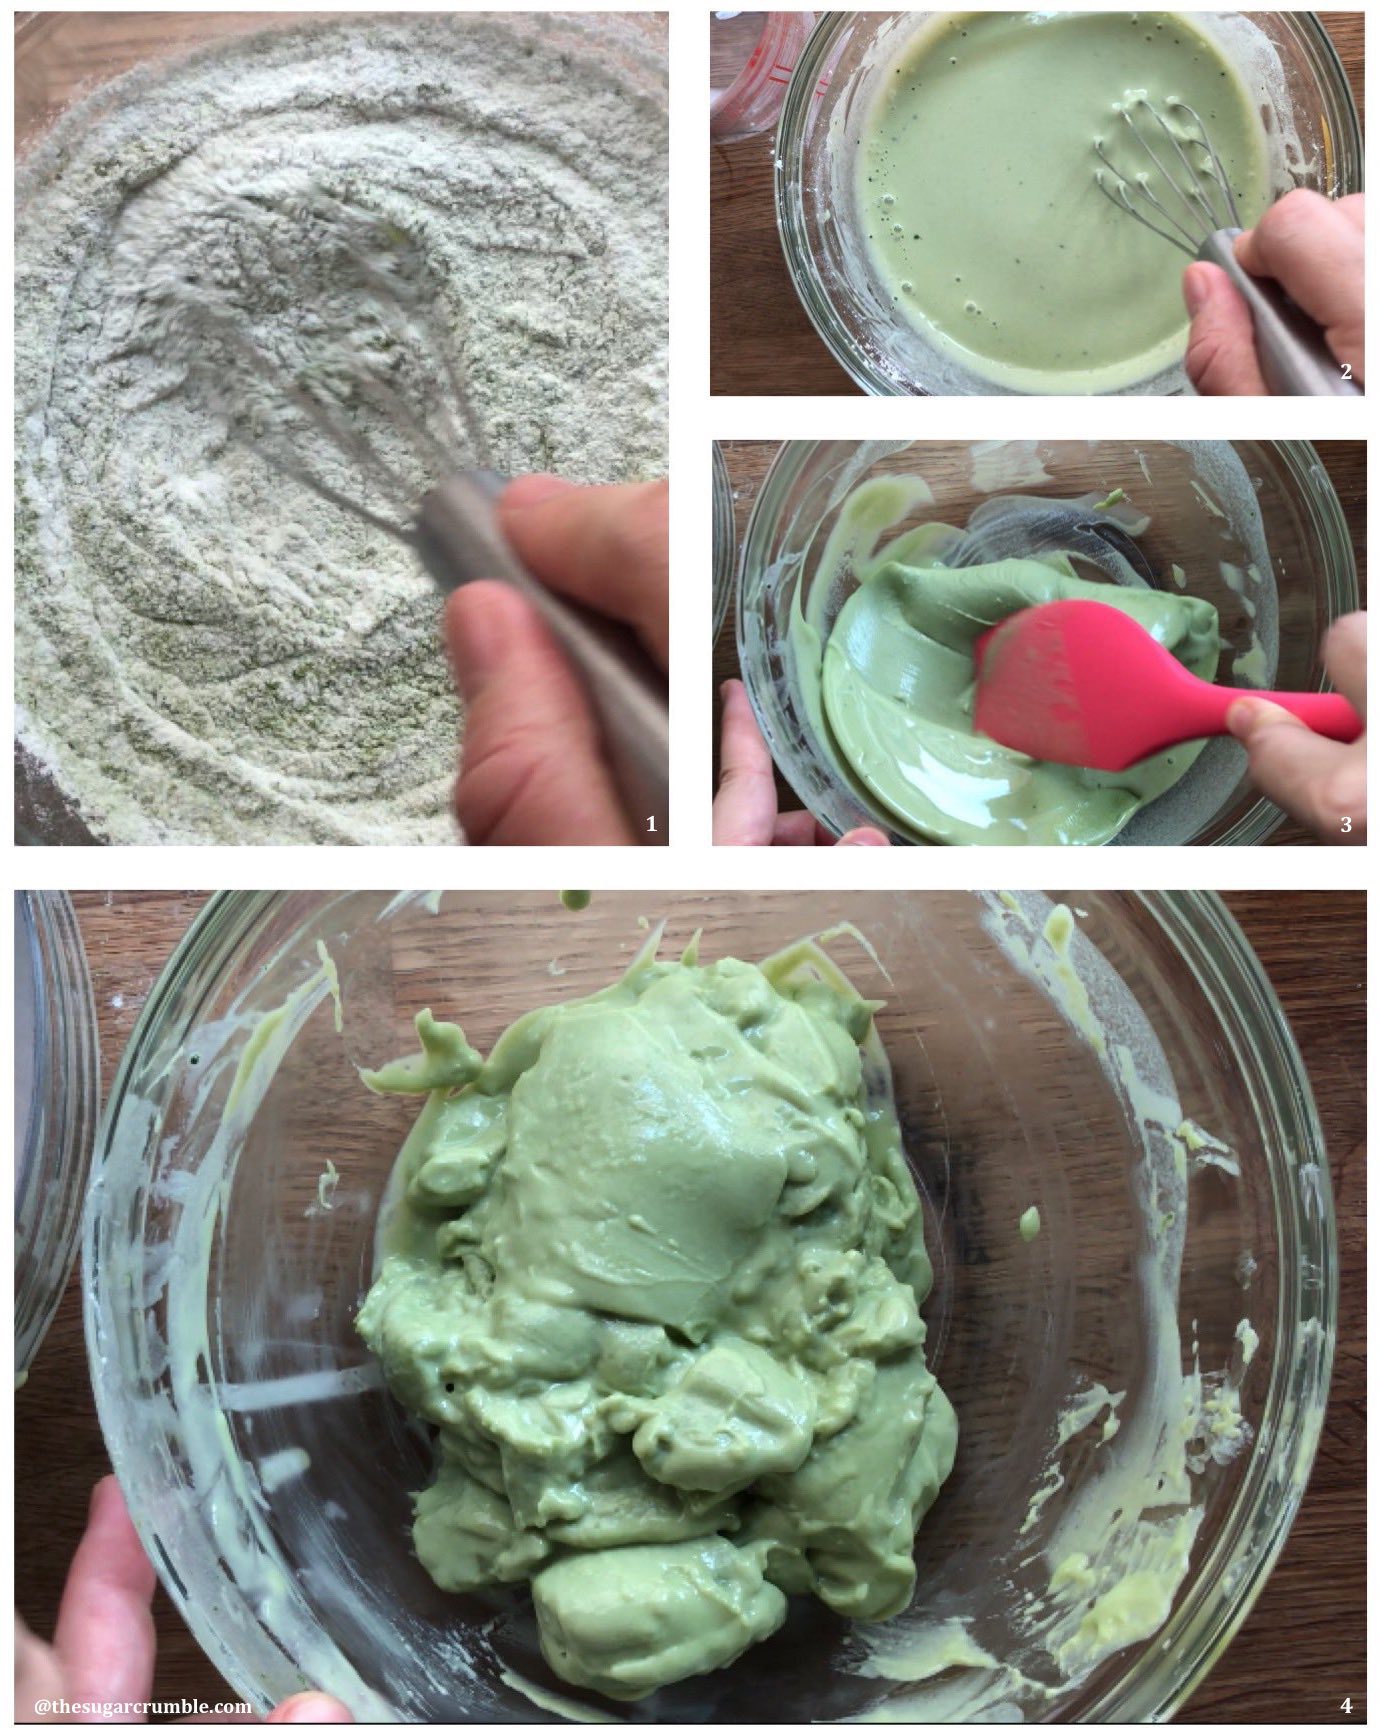
- Combine the glutinous flour, matcha powder and sugar in a medium size glass bowl and give it a good mix.
- Gradually whisk in the milk into the flour mixture, gently stirring until the milk is fully incorporated. Sieve to remove any lumps.
- Microwave the mochi batter for 3 1/2 minutes on high heat, stirring after every minute. The mochi dough is done when it forms a sticky dough and there is no more liquids in the bowl.
Assembly
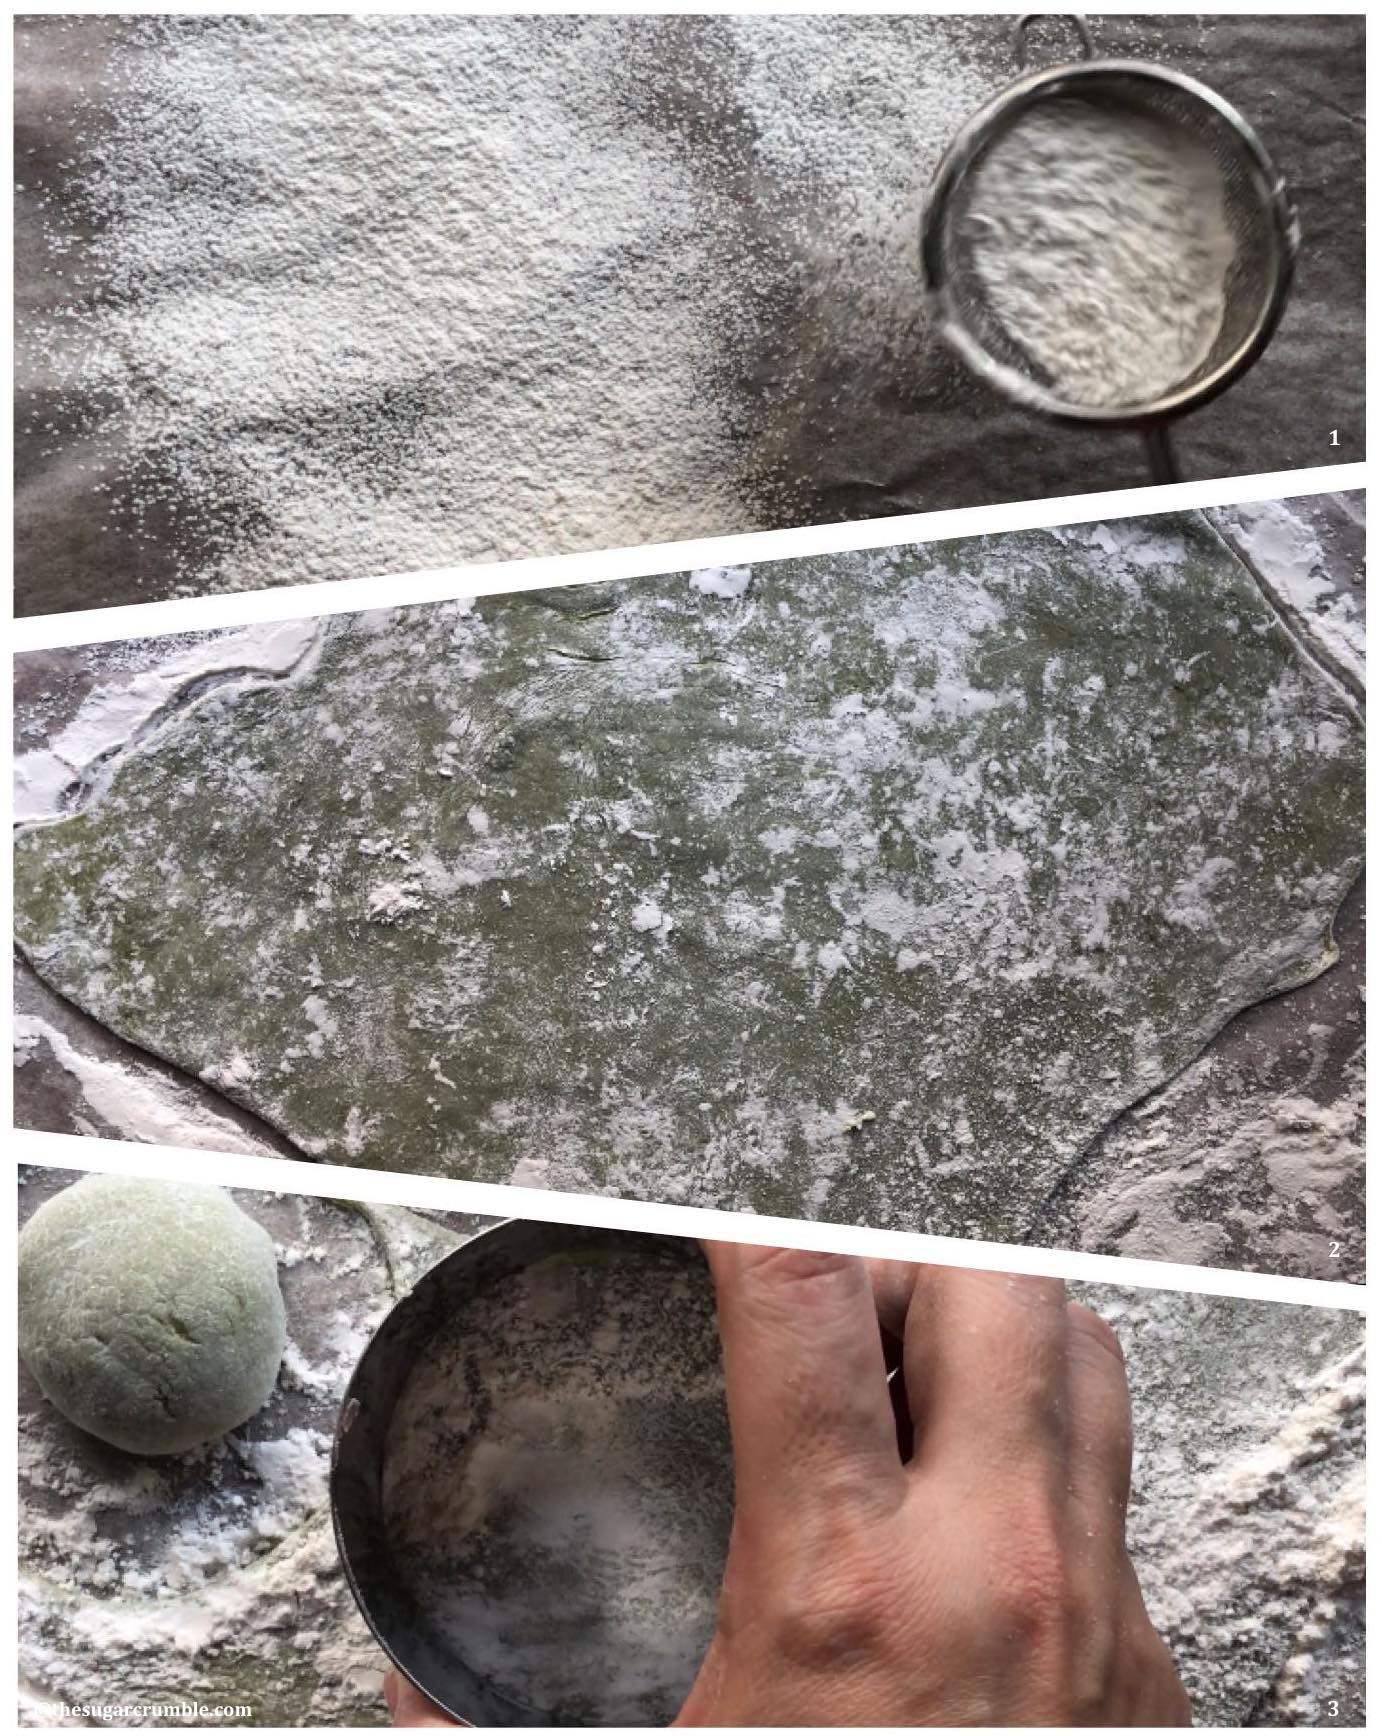
- Flour parchment generously with corn starch and roll out the mochi dough on the parchment. This is a very sticky dough so flour the mochi dough too, and as required.
- Roll out the mochi dough into a ~ large rectangle. Slide the rolled out mochi sheet onto a tray and refrigerate for 10 minutes to allow it to firm up.
- Once it is chilled, the mochi dough (still soft) will be firm enough to work with. Using a round 8cm cutter, cut out as many rounds as possible in the mochi dough.
- Gently pick up one cutout mochi dough and brush off excess flour on each side with a pastry brush. Then, heap 1 tsp of azuki bean filling in the centre of the mochi dough and gently seal the seams close.
- Place the sealed mochi seam side down unto the work table, turning it gently and shaping it rounder with your fingers until the mochi is nice, round and plump.
- Brush off any excess flour and the mochi is done. Repeat with the other cutouts.
- Do not waste the mochi dough scraps. Gently dust off all excess flour from the dough scraps, combine into a ball and re-roll to make more mochis.
- Once assembled, store the mochis sealed in an airtight container at room temperature to prevent drying out. The mochis is most delicious, eaten fresh on the day itself or within 2 days. (Note: *do not refrigerate* or the mochi skin will turn hard)
Video
Notes
If you like this recipe tutorial and like to see more, subscribe to my YouTube channel here! 😊
Matcha Mochi in 3 Easy Steps
#1 Combine the mochi dough ingredients. Microwave on high for 3 1/2 minutes (stirring after each minute) to cook the dough.
 #2 Flour generously and roll out the mochi dough. Chill for 10min to firm the dough and then cutout the mochi skin.
 #3 Brush off excess flour and fill the mochi round with sweet bean paste. Seal seams, dust off any excess flour. Enjoy!
 *Please chew your mochis*
This is not related to the Matcha Mochi recipe but as mochi accidents have become more common, I am mindful to include this ‘tip’ as I make these sweet snacks for my parents who are octogenarians.
Mochis must be chewed properly or the sticky glutinous rice snack can easily become a choking hazard especially for young children and the elderly. Therefore please always chew properly and slowly savor all the flavors of the mochi and its deliciousness.
Storage
This Matcha Mochi is best eaten freshly made on the day itself; otherwise consume within 2 days. Do not fridge or chill as the mochi will become hard. Cover with a layer of cling wrap and store in an airtight container at room temperature.
*Please chew your mochis*
This is not related to the Matcha Mochi recipe but as mochi accidents have become more common, I am mindful to include this ‘tip’ as I make these sweet snacks for my parents who are octogenarians.
Mochis must be chewed properly or the sticky glutinous rice snack can easily become a choking hazard especially for young children and the elderly. Therefore please always chew properly and slowly savor all the flavors of the mochi and its deliciousness.
Storage
This Matcha Mochi is best eaten freshly made on the day itself; otherwise consume within 2 days. Do not fridge or chill as the mochi will become hard. Cover with a layer of cling wrap and store in an airtight container at room temperature.
#2 Flour generously and roll out the mochi dough. Chill for 10min to firm the dough and then cutout the mochi skin.
#3 Brush off excess flour and fill the mochi round with sweet bean paste. Seal seams, dust off any excess flour. Enjoy!
*Please chew your mochis*
This is not related to the Matcha Mochi recipe but as mochi accidents have become more common, I am mindful to include this ‘tip’ as I make these sweet snacks for my parents who are octogenarians.
Mochis must be chewed properly or the sticky glutinous rice snack can easily become a choking hazard especially for young children and the elderly. Therefore please always chew properly and slowly savor all the flavors of the mochi and its deliciousness.
Storage
This Matcha Mochi is best eaten freshly made on the day itself; otherwise consume within 2 days. Do not fridge or chill as the mochi will become hard. Cover with a layer of cling wrap and store in an airtight container at room temperature.