
Christmas Mochi Elves!
These Christmas Mochi Elves are just too cute. Filled with biscoff spread on a sweet juicy strawberry, put them on any Christmas bake and they will weave their irresistible elf magic! What can I say? Christmas is in the air, ENJOY 😊!
Servings: 12 Mochi Elves
Ingredients
Mochi Dough
- 1/2 cup glutinous rice flour
- 1/8 cup caster sugar
- 100 ml milk @room temperature
Filling
- Biscoff spread (1 tsp per mochi)
Decor
- Strawberries
- Rosemary sprigs
Christmas Log Decor
- 1 layer tiramisu ‘Log’ (For this, I halved my naked tiramisu recipe - check link in blog post above)
- 1 large biscuit cone
- Whipped cream or any frosting of your preference
- Sugar hollies for 🌲 decor
Instructions
Mochi Dough
- Combine the glutinous flour and sugar in a medium size glass bowl and give it a good mix.
- Gradually whisk in the milk into the flour mixture, gently stirring until the milk is fully incorporated. Sieve to remove any lumps.
- Microwave the mochi batter for 3 minutes on high heat, stirring after every minute. The mochi dough is done when it forms a sticky dough and there is no more liquid in the bowl.
Making the Mochi
- Flour parchment generously with corn starch and roll out the mochi dough on the floured parchment. This is a very sticky dough so flour the mochi dough too and as required.
- Roll out the mochi dough into a ~ large rectangle. Slide the rolled out mochi sheet onto a tray and refrigerate for 10 minutes to allow it to firm up. Once it is chilled, the mochi dough (still soft) will be firm enough to work with. Using a round glass or cutter ~7cm, cut out as many rounds as possible in the mochi dough.
- Gently pick up one cutout mochi dough and brush off excess flour on each side with a pastry brush. Then, heap 1 tsp of biscoff filling in the centre of the mochi dough and gently seal the seams close.
- Place the sealed mochi seam side down unto the work table, turning it gently and shaping it rounder with your fingers until the mochi is nice, round and plump. Brush off any excess flour and the mochi is done. Repeat with the other cutouts.
- Do not waste the mochi dough scraps. Gently dust off all excess flour from the dough scraps, combine into a ball and re-roll to make more mochis.
Elf Assembly
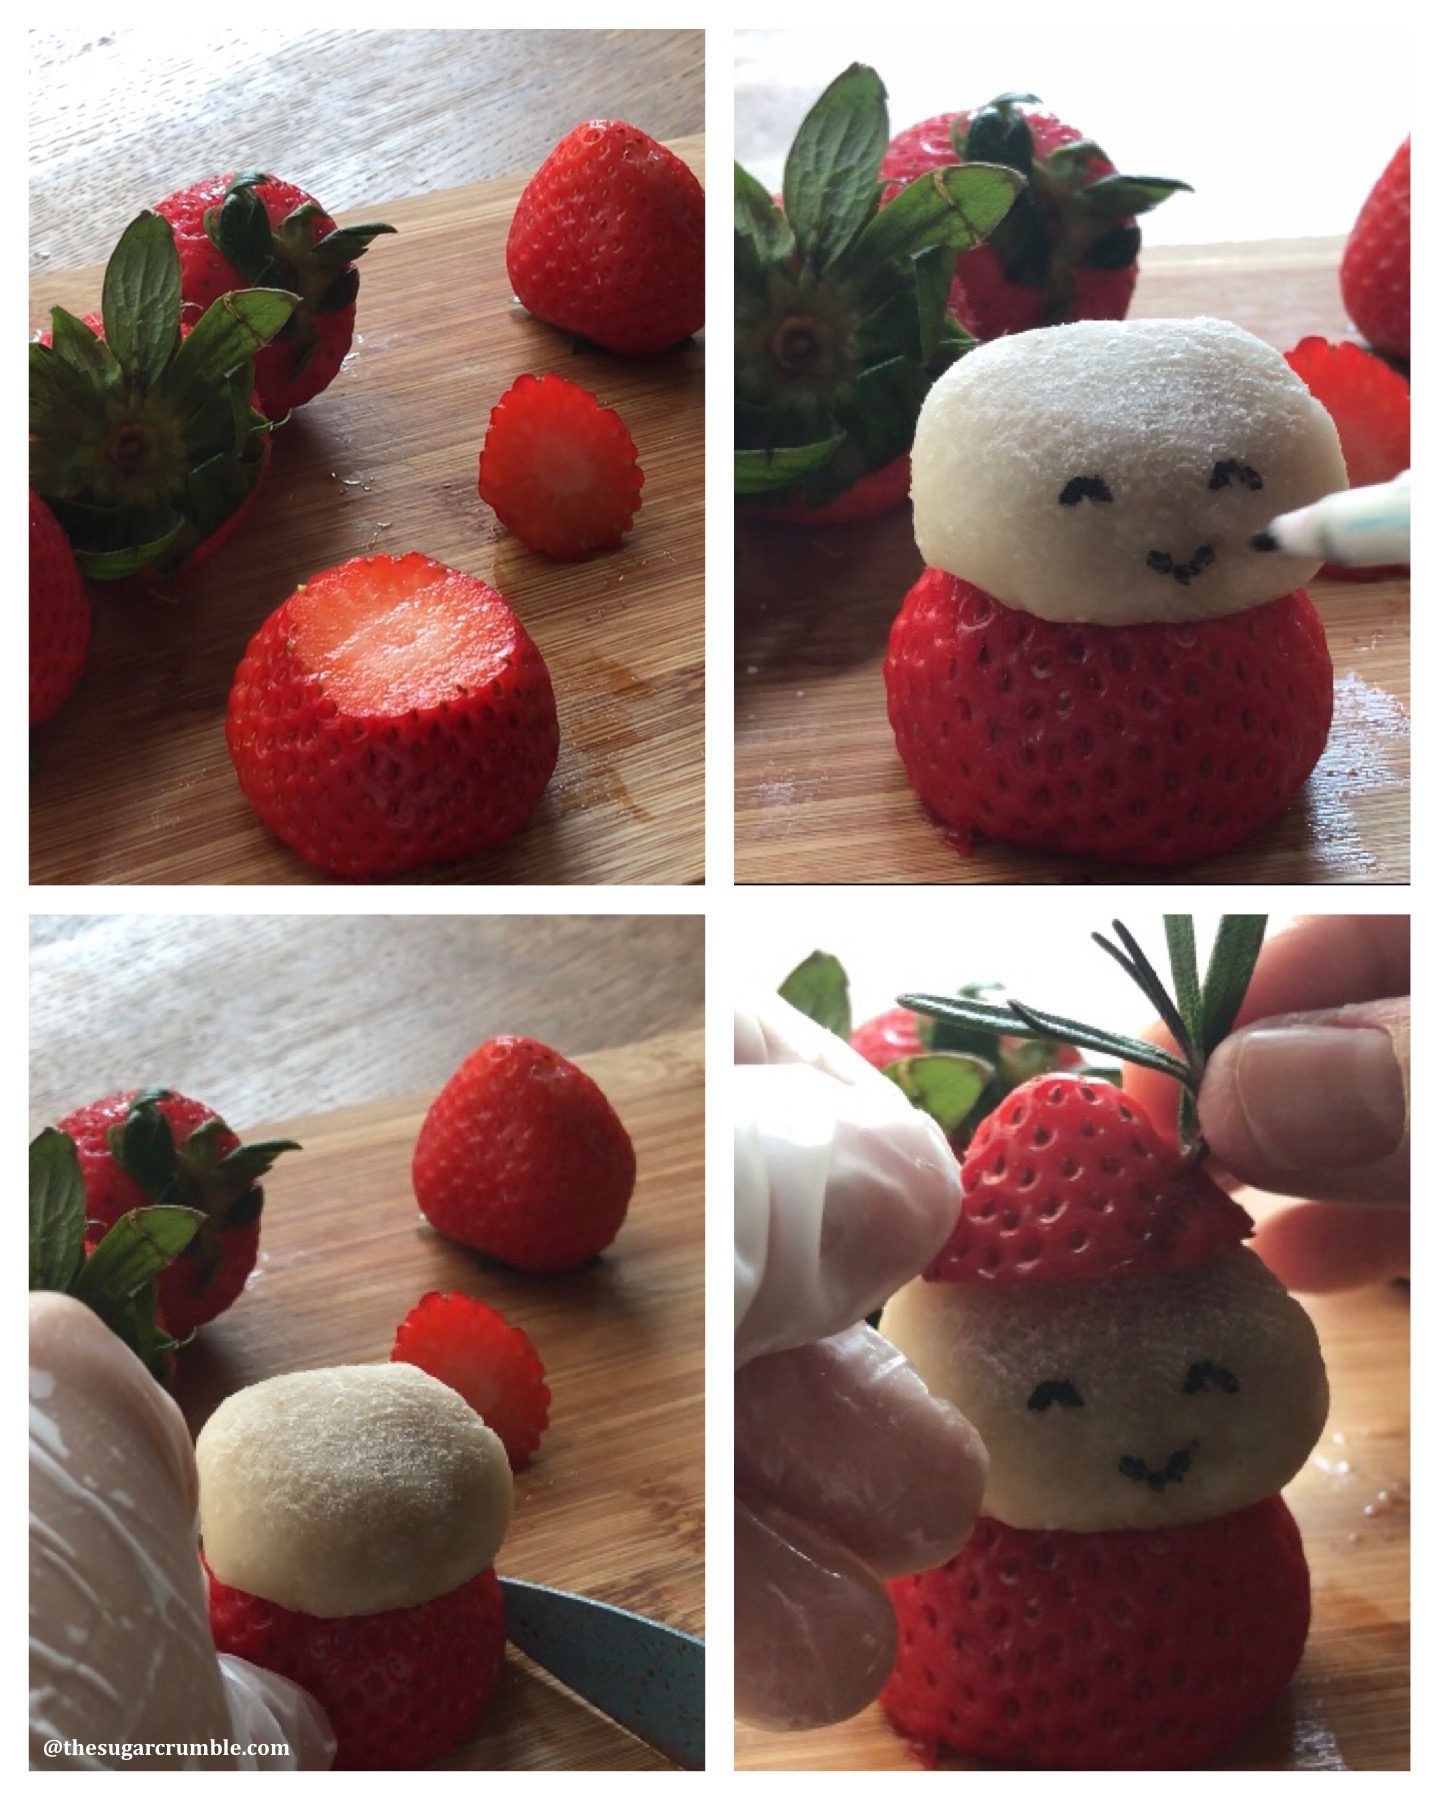
- Hull a strawberry flat. Cut off the the pointy tip of the strawberry to use as a hat.
- With the strawberry tip side facing up, place on one mochi and using a food marker, draw in your happy face.
- Pierce the cut off strawberry tip with a small rosemary sprig (optional) and cap it on the Mochi Elf.
- Assemble these Mochi Elves on your Christmas bake just before serving and serve immediately.
Video
Notes
If you like this recipe tutorial and would like to see more, subscribe to my YouTube channel here! 😊
#1 Easy Mochi - just 3 simple steps
Combine the mochi dough ingredients & microwave on high for 3 minutes (stirring after each minute) to cook the dough.
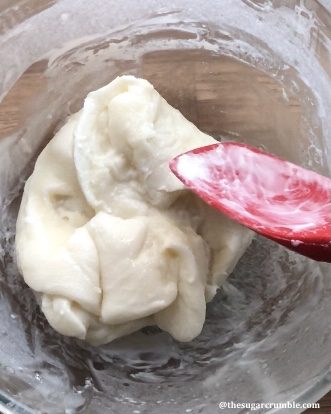 Mochi dough done in 3 minutes
Flour generously and roll out the mochi dough. Chill for 10 minutes to firm the dough and then cut out the mochi skin and fill.
Mochi dough done in 3 minutes
Flour generously and roll out the mochi dough. Chill for 10 minutes to firm the dough and then cut out the mochi skin and fill.
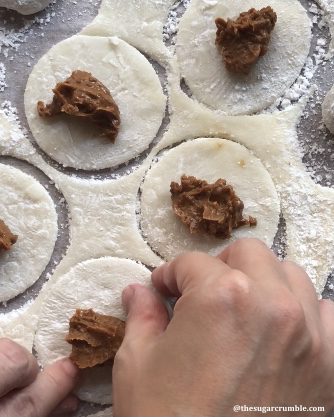 Fill, fill, fill ...
Seal seams, dust off any excess flour. Enjoy
Fill, fill, fill ...
Seal seams, dust off any excess flour. Enjoy
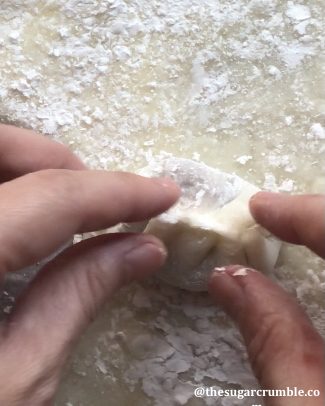 Seal, dust, done!
#2 Please chew your mochis
This is not related to the recipe but I am mindful to include this ‘tip’ as I make mochis for my parents who are elderly folks. Mochis must be chewed properly or they can easily become a choking hazard especially for young children and the elderly. Hence please do remind them to chew properly and slowly savor all the flavours of the mochi and its deliciousness.
#3 Filling
The birthday girl loves biscoff spread and that’s the chosen fave filling for these Mochi Elves. But one can also use nutella, peanut butter, azuki red bean filling or whatever floats your boat!
Quick note for the biscoff, nutella and peanut butter fillings, the oil in these spreads tends to seep into the mochi if it is made ahead and left for more than a day. Hence I typically make the mochi on the day itself and assemble the Elves just before serving.
If you really had to make the mochi ahead and they have become oily - brush the mochi with a little corn flour which will help to absorb the oiliness, before drawing in your happy elf face.
#4 Just-in-Time Elf Assembly
It’s SUPER EASY to assemble the Mochi Elf. All you need is a large juicy strawberry, the freshly made mochi, some rosemary sprig and a food marker. One important note is to assemble the elves just before serving. Otherwise the Mochi Elves might lose its softness if they have be refrigerated or are left exposed for too long.
Seal, dust, done!
#2 Please chew your mochis
This is not related to the recipe but I am mindful to include this ‘tip’ as I make mochis for my parents who are elderly folks. Mochis must be chewed properly or they can easily become a choking hazard especially for young children and the elderly. Hence please do remind them to chew properly and slowly savor all the flavours of the mochi and its deliciousness.
#3 Filling
The birthday girl loves biscoff spread and that’s the chosen fave filling for these Mochi Elves. But one can also use nutella, peanut butter, azuki red bean filling or whatever floats your boat!
Quick note for the biscoff, nutella and peanut butter fillings, the oil in these spreads tends to seep into the mochi if it is made ahead and left for more than a day. Hence I typically make the mochi on the day itself and assemble the Elves just before serving.
If you really had to make the mochi ahead and they have become oily - brush the mochi with a little corn flour which will help to absorb the oiliness, before drawing in your happy elf face.
#4 Just-in-Time Elf Assembly
It’s SUPER EASY to assemble the Mochi Elf. All you need is a large juicy strawberry, the freshly made mochi, some rosemary sprig and a food marker. One important note is to assemble the elves just before serving. Otherwise the Mochi Elves might lose its softness if they have be refrigerated or are left exposed for too long.
 Easy peasy!
#5 Storage
*DO NOT* fridge or chill the mochi. Cover with a layer of cling wrap and store in an airtight container at room temperature. For best effect, make your mochi fresh on the day itself and always assemble the Elves just before serving. Best eaten fresh on the day itself & consume within 2 days.
Easy peasy!
#5 Storage
*DO NOT* fridge or chill the mochi. Cover with a layer of cling wrap and store in an airtight container at room temperature. For best effect, make your mochi fresh on the day itself and always assemble the Elves just before serving. Best eaten fresh on the day itself & consume within 2 days.
Mochi dough done in 3 minutes
Flour generously and roll out the mochi dough. Chill for 10 minutes to firm the dough and then cut out the mochi skin and fill.
Fill, fill, fill ...
Seal seams, dust off any excess flour. Enjoy
Seal, dust, done!
#2 Please chew your mochis
This is not related to the recipe but I am mindful to include this ‘tip’ as I make mochis for my parents who are elderly folks. Mochis must be chewed properly or they can easily become a choking hazard especially for young children and the elderly. Hence please do remind them to chew properly and slowly savor all the flavours of the mochi and its deliciousness.
#3 Filling
The birthday girl loves biscoff spread and that’s the chosen fave filling for these Mochi Elves. But one can also use nutella, peanut butter, azuki red bean filling or whatever floats your boat!
Quick note for the biscoff, nutella and peanut butter fillings, the oil in these spreads tends to seep into the mochi if it is made ahead and left for more than a day. Hence I typically make the mochi on the day itself and assemble the Elves just before serving.
If you really had to make the mochi ahead and they have become oily - brush the mochi with a little corn flour which will help to absorb the oiliness, before drawing in your happy elf face.
#4 Just-in-Time Elf Assembly
It’s SUPER EASY to assemble the Mochi Elf. All you need is a large juicy strawberry, the freshly made mochi, some rosemary sprig and a food marker. One important note is to assemble the elves just before serving. Otherwise the Mochi Elves might lose its softness if they have be refrigerated or are left exposed for too long.
Easy peasy!
#5 Storage
*DO NOT* fridge or chill the mochi. Cover with a layer of cling wrap and store in an airtight container at room temperature. For best effect, make your mochi fresh on the day itself and always assemble the Elves just before serving. Best eaten fresh on the day itself & consume within 2 days.